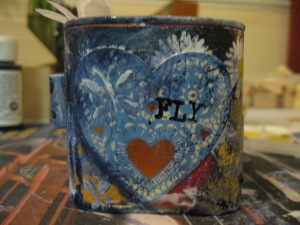
back of box - notice all the butterflies!

an assortment of boxes

modge podge - one of my favorite things!
and of course you’re going to need a good amount of this! one time for an art class in college i used this to cover a whole table with magazine images. how fun is that?

all the pretty things that is going to go on/in the box
then here is the collection of paper, pictures, magazine images, old glass tiles, stickers, flowers and tags that i’m going to use to decorate the box. you can start to see the theme already. start using that modge podge!

start using that modge podge!
now, begin to use the modge podge. it’s just like glue, but it works best if you put a layer of modge podge on the tin, and then put the paper on, and then put a layer of podge modge over the paper. to make life easier, use more bits of smaller paper rather than large pieces of paper. the larger the paper the harder it is to get it to lay like you want it to! especially on a box like this that has curves…

more modge podge start attaching the pretty little things
now you can see that i’ve started to add the decorations. i’ve even done the bottom of the box! it’s ok to totally wrap the entire thing. sometimes i just let this dry because i think the collage can be very pretty. so if you like it the way it is, you don’t need to paint it. it’s totally up to you.

start to paint!
so, if you’ve decided to keep going. get out that paint brush, and sponge. your sponge is your best friend for making interesting textures and layers over the pretty paper… paint the lid tooand don’t forget about the lid! i don’t mind that some of the original red is showing through, and i’ve even added some buttons and stickers.

don't forget the inside!
now this part might be a little tricky. i’ve used a hot glue gun as well as more modge podge to put a fabric liner on the inside. won’t that be pretty?

add pretty things to hide the mistakes
mistakesit was a little harder than i thought. :) most of the time i just leave the pretty tin because i think that’s interesting too. so whatever you fancy. if you make mistakes, don’t worry, you can always use your pretty little things to cover it up. sometimes the inside needs a lot of hiding!

sometimes the inside needs a lot of hiding!
as you can see, i added a couple things on the inside…

side of the box
now you can see my finished project. i got a little crazy with the butterfly theme… but it’s still pretty and it sure was fun! lid- buttons and stamps

- front of box- all about butterflies!
you can see the little glass tiles stick out quite a ways, they’re a fun addition, but kind of challenging to get to stay attached. :) i hope you now can feel confident to make your own box for that special gift for that special someone… :) enjoy! if you’d like to see more of my boxes, i’m hoping to have some more pictures up in a couple of days and maybe sell some on etsy! i’ll keep ya posted! let me know how it goes if you do make one!


1 comment
Comments feed for this article
November 26, 2009 at 11:29 am
Teri
Hi Kim!! Cute boxes!